iPad Air Review

iPad Air Review
This isn't a typical in-depth review. You can visit the Apple website to find out more about the iPad Air for all the technical specs. There are also other reviews that get into comparisons to other iPads and tablets in general. I will review it based on my day-to-day use of a tablet.
The Pros
The Retina Screen: If the tablet you are looking at doesn't have an HD screen then you should consider just skipping it. Resolution is only going to climb higher over time. However, sometimes cost is the higher priority. The weight: At 1 pound this thing is really great to use. Less tiring using it while watching TV or lying in bed. It is all screen. It is fast: At 64bit it screams loading the apps and everything is running much more stable as compared to my iPad 1. Responsive: I really don’t have to touch the screen more than once for it to respond to my commands. Android just doesn't have this one down yet, although it isn't bad. It Works Like a PC: My website works perfect on the iPad. Not true on Android devices. Touching the iPad acts more like a Mouse hover than a click when it needs too. App selection: Great selection and relatively safe to download and use them.
The Cons
The biggest thing that aggravates me about iPad’s is that in order to get GPS you have to buy the cellular feature. I really just do not like that about iPads. The Android tablets provide GPS without needing to spend another $130 on the tablet. I already have 3 data plans and I just don't want to pay for a 4th on my iPad. The max I am willing to spend on a tablet is $600. That gets me 32GB which I can live with, but adding storage is a little pricey on the iPad. 64GB is what I would like, but priced out of my range to justify. After you add the Apple Air Smart Case you have another $80 invested. Androids typically have SD Card slots to add cheap storage. 32GB with a storage card seems about right to me. I use my iPad for work and play, and store over 7,000 of my photographs on it. All the cloud applications have apps in the iTunes store that I make use of, and all the social apps make great use of the screen real estate on an iPad. I can watch TV with my Dish app, check my email and view my photo website connected or disconnected from the web via apps.
The iPad Air or any tablet lets you get away from the desktop or even the cumbersome laptop that is sold as portable. In the summer I sit on my deck and read and research various articles and websites, and send a few emails. I can even watch some TV and enjoy the summer warmth and singing of birds. When friends visit they can enjoy my picture album right on the iPad rather than my old photo albums that now collect dust. The big plus is that I don’t have to remind people to not touch the photos. On the iPad touch all you want.
Just don’t want an iPad?
If I were to purchase an Android tablet I would probably buy the Nexus line that remains pure to the software and comes at a great price point. No bells and whistles, but up-gradable without waiting on a third party like Samsung.

Closing Thoughts
An App that I use for productivity is Notability. Great for note taking and organizing them for future reference. I had been using a rubber tipped stylus with my iPad 1, but on the iPad Air it wasn't working well at all. I decided to go with a micro-fiber tipped stylus and what a difference it made. After using the new pen I am not sure why anyone would even manufacture a rubber tipped stylus. I decided on the click-pen stylus from New Trent. I received 2 stylus pens for less than the price of one rubber tipped stylus. If you want to use a stylus pen check out the micro-fiber option. It is the best.
If you are on the fence about even owning a tablet you really should think about how portable they really are compared to laptops, and how much easier they are to use than a phone. Since tablets arrived on the market there has been lot less squinting for me trying to look at that tiny phone screen. It is also great to take along with you when the wife wants to go shopping. I get a seat in the shoe department of a department store and read a book or connect to free Wi-Fi and surf the web using the Flipboard App.
However, once in a while you need to put the computer aside and get out and see the world. Happy travels, and take your camera.
Lightroom Keyword List
If you have been considering Adobe's Lightroom or have Lightroom you will probably want to take advantage of the Keyword List that is made available to you. If you are like me, you are probably wondering where to start. Once you figure out where to start you need to figure out where you end it as well. In this post I will review my Keyword List and how I arrived at the list I created.
The first thing to consider is what is important to you. For example I like to identify all my family and friends in my photos. That helps me locate pictures of them very quickly. So I created a high level keyword "People", and under "People" I create two keyword tags called "Family" and the second called "Friends". Everyone's name that I add either appears under "Family" or "Friends". If they don't fit into these two categories I just add the name under "People". For example I have several photos with Desmond Tutu in them. He isn't family nor a friend so I placed his name under "People". The format that I use is "Last Name First Name". Example; "Tutu Desmond". Just a space separates the last name from the first name. I use the last name first so family members group together.
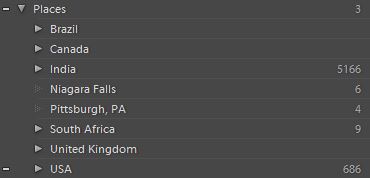 The second keyword I created was "Places". I like to keep track of where I have been and where the picture was taken. I do this via GEO Tagging and keywords. Under Places I create keywords for each country I have pictures from, and within country I have States, Providences or regions. Typically at the lowest level is the city or possibly a state park. In the photo to the left you will see the high level structure. You can also see that I have a couple of keywords remaining that I created before I put in the final structure I described. It is very easy to get the remaining pictures in the correct keyword list. Since many of my pictures are published to my website via Lightroom it does require me to republish the pictures which Lightroom makes very easy.
 A third keyword grouping I created is called "Transportation". I have created a keyword for everything that I have a picture of including an ox cart. I don't track information on sedan or coupe, nor do I keep track of motor size. I try to go down to the model level if I know it otherwise I go up a level. The picture on the left shows you a break down on a few of my keywords under "Transportation". Independent of "Transportation" I have individual keywords for each of the cars I have owned. So I am able to call up every picture I have of my 1964 Chevy Belair. Keyword "1964 Chevy BelAir".
The other main Keyword List that I have is "Wildlife". Under wildlife I have Birds, "Bugs and Insects", Domesticated, Fish, Mammals, and "Reptiles and Amphibians". Man is not an animal nor would I consider him wildlife. They appear under "People".
I also have a Keyword List for "Flowers & Plants" but it isn't as large as the others. Mainly because I don't know all the names of the various plants and I haven't decided to take up learning all of that.
I do have a few other smaller Keyword Lists for Season, Weather, Weddings, and Style (landscape, panorama, aerial), Time, Water (Bay, Creek, River, Fountain, Lagoon, etc).
As I mentioned you can take keywords too far, but you need to consider how you might want to locate one of your favorite photos. In my Lightroom catalog I have 39,604 photographs that span over 50 years. I need good keywords to help me locate what I want. After that it is about discipline and adding the keywords to your photographs, or creating new ones.
Please comment below if you want to share your Keyword List strategy.
Get out and see the world, and take a picture while you are at it.
Photoshop Shake Reduction
In November of 2012 I posted about not deleting your pictures if they are not in perfect focus. Some bloggers/experts recommended that you delete them, while I suggested that you do not know what will be possible in the future. Well the future is here. Photoshop Shake Reduction will be available in June of this year. Checkout the video below. I have a few pictures that meet this criteria waiting on me to apply the fix. I am sure this feature will continue to get better and would work great on my type of photography which is run and gun. I have a lot of photos that I have taken from moving cars and auto rickswaws that this might really help. [color-button color=orange href="http://bhagavideo.com/2012/11/the-future-of-photography-technology/"]See my post "The Future of Photography Technology"[/color-button]
Want to learn more about Shake Reduction?
Adobe Shake Reduction Checkout the Adobe Blog
Checkout Terry White's Blog
Scanning Negatives on the Epson V700
I have been using my Epson V700 to scan slides for the past couple of months. I wrote a review of the scanner about 2 months ago. If you want to read the original article click here. I scanned a few pictures for that post on the V700 scanner, but not any negatives. Scanning negatives was one of the primary reasons I bought the V700 Photo Scanner so I figured I best get at it! Many people have stated that the negative holders feel cheap or flimsy, and I guess they do compared to the slide holder. So when loading in negatives make sure that you take your time and work on a flat surface. That should help prevent any damage from occurring.
The first negatives I scanned were the first ones I found in my storage compartment. I reached in and took out some of the envelopes and stopped at the first one that also contained the negatives. That turned out to be from a work Christmas party in December 1983. So they were just over 29 years old. The prints were stored with them and I did remember correctly that the color of the prints was muted and not very vibrant. I like my pictures to pop a little more so I was going to have to fix that. The negatives were in good condition, meaning never handled, stored in a dry place and flat, not curled.
The film was taken to a local drug store for processing on Dec 26, 1983 and was Kodak Kodacolor VR 100 (the label on the film is KODAK CP 100). The film was cut into strips of 4 and the Epson negative holders can hold a strip of 6. So that wasn't going to be a problem. When handling the film I used cotton gloves, and after mounting the negatives into the holder (KODAK CP 100 facing down towards the flatbed) I sprayed them with a compressed gas duster as the only cleaning I did. I then turned the scanner on and started SilverFast 8. From the research that I did and the few days that I used the demo software, I decided that SilverFast was the way to go for me. I really do not care about ease of use because what I need is something that works, not something that is easy. Believe me, SilverFast is much easier to learn than Photoshop. I was able to become comfortable with SilverFast in about 3 days working a couple hours each day. Since then, each day builds on the previous and now I am learning additional info about Silverfast at my leisure.
I scanned the first batch of negatives manually, and the second batch using the automatic features of SilverFast. In this case I found the automatic processing to do a very good job. I was happy with it, but of course nothing escapes Lightroom and Photoshop for the final result. I do not add sharpening during the scanning process. I save that for the processing I do in LR and PS. This post is really about the V700 and not any software that I use with it, so I will say that SilverFast has the CP 100 negative type film that I can select to tell it what type of film is being scanned.

What I found is that the final image from the scanned negatives look good, were well received when I shared them with my friends, and some were surprised that I had scanned them from negatives and not the actual print itself. As typical, the scanned negatives were a little soft on focus, but could be adjusted to a sharper image if necessary. Just be careful not to add too much, it is best to keep people on the softer side of a focus anyway! Many times I adjust a pictures lightness and darkness based on a person's hair. Trying to make sure it has some detail and the shading looks good. Skin tones needing to be correct is a no brainer so don't miss the boat there.
They say a picture is worth a thousand words, so here are some pictures that illustrate what I have discussed above.

Notice how the details of the blouse are brought out perfectly and the skin tones are pleasant as well. Just a little rosy color on the cheeks.
The next set of pictures shows the before and after scanned negative of Mr. Hunter as well as the scanned version of the actual picture from 1983. When scanning a picture you need to replace the white insert into the lid of the scanner (reflective scanning).


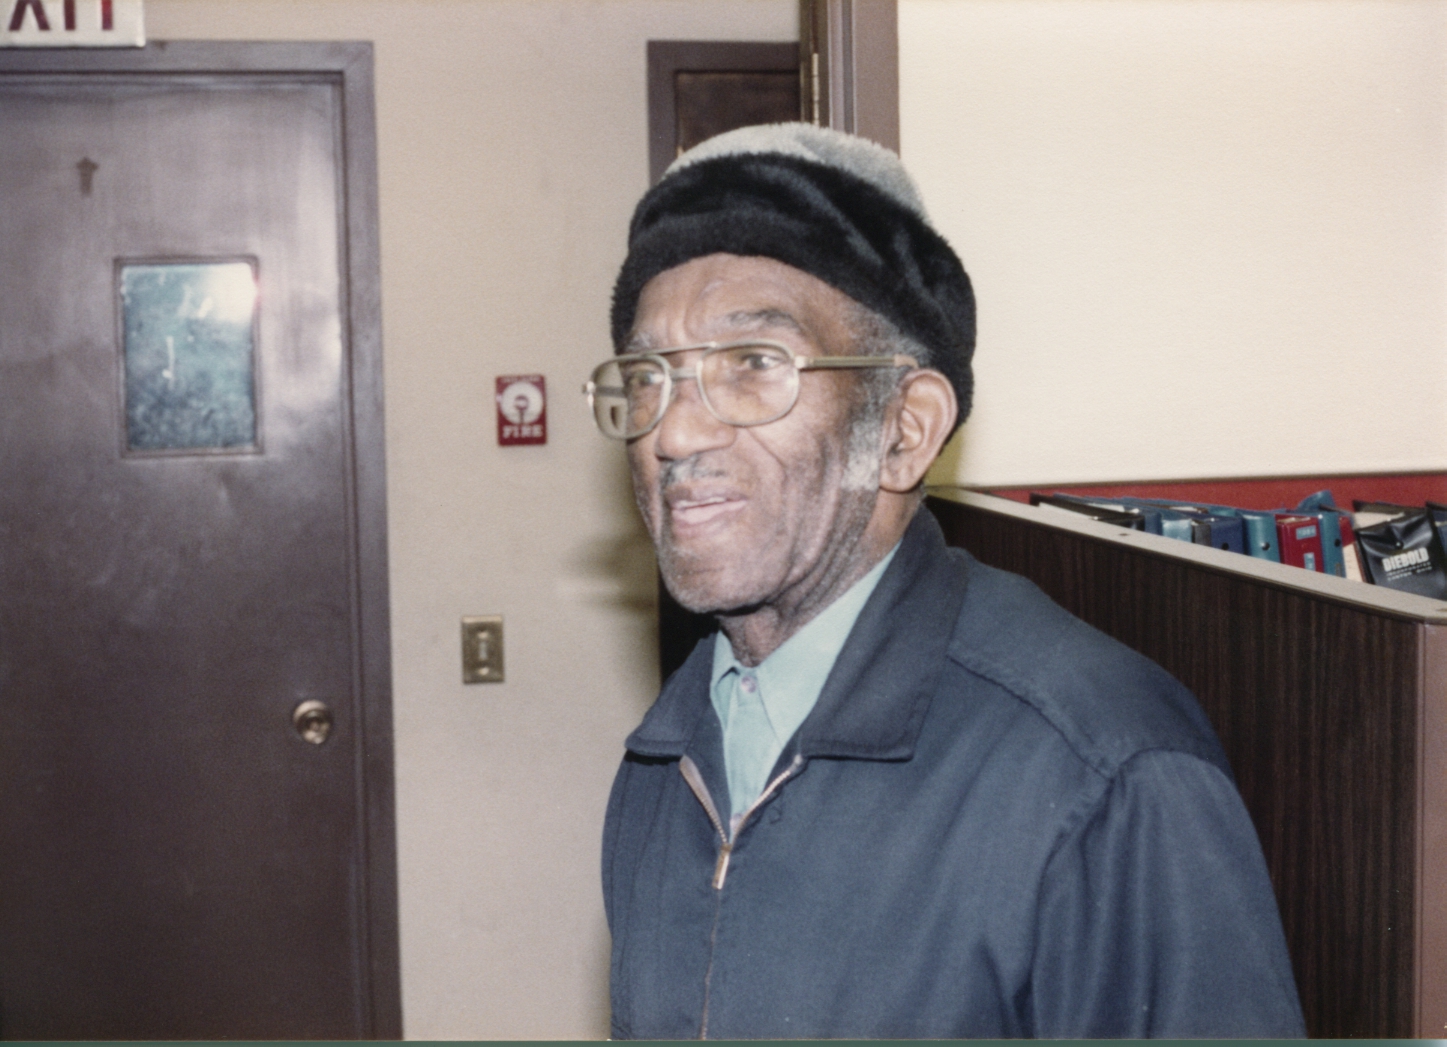
Naturally the above scanned photo could have color correction applied and the colors from the negative versions would be similar. The negatives were scanned at 3,200DPI and larger versions of the picture look very good.
Note: The scanned negative contained more information that what was actually printed in the picture in 1983. In this case the negative scan brought in more information which made a difference on many of the other prints from this set.
Hopefully the above information has been useful or has inspired you to scan in some of your old photographs and share them digitally with your friends.
WordPress Website Overhaul Follow-up
It has been two months since I posted my Wordpress Website Overhaul 3 part series and I thought I should do a follow-up to that. Making sure your site is functioning just the way you want it, is an on going effort. So I thought I would provide some stats and also let you know what I removed, what I added and also cover a couple of things I didn't mention last time.
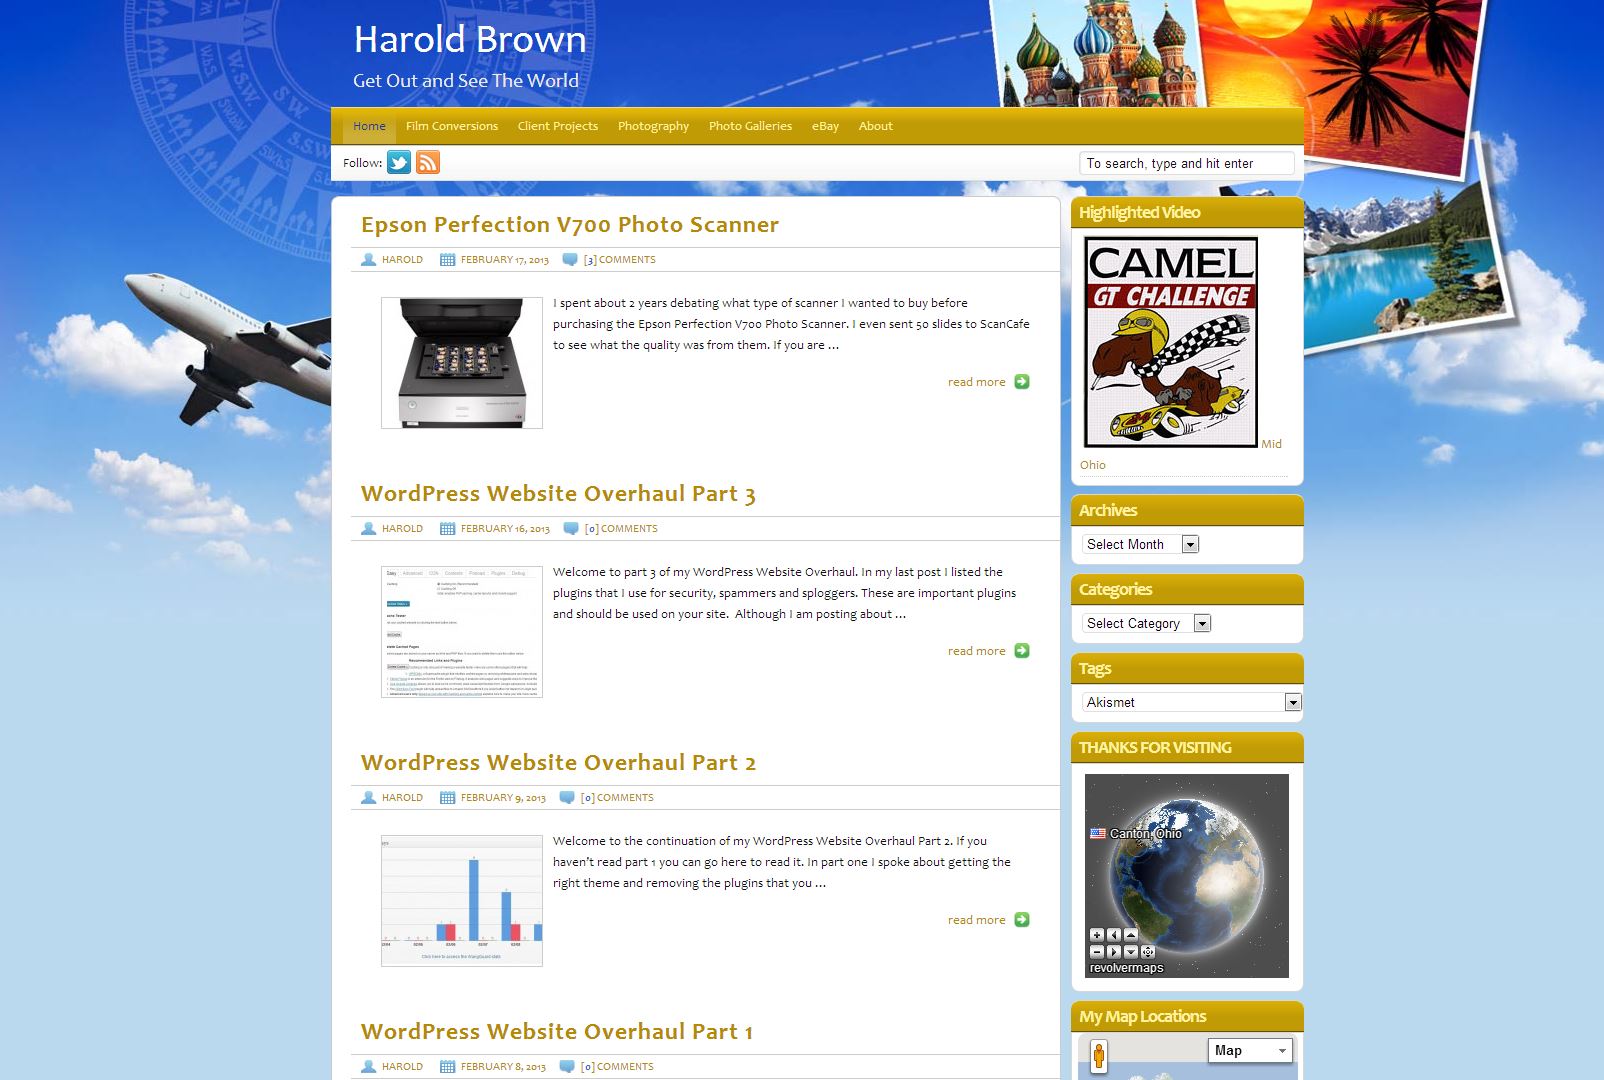
In my first post I mentioned how I had used multiple Themes and finally selected one that I like based on some functionality that it brought along with it. That is a good way to go, but you should also consider that relying to much on that functionality can eventually be a curse if you decide you want to change Themes down the road. I like the built in Google Maps functionality the Theme brings, but you can get that functionality without needing it in the Theme. Just something to think about.
There is generally a lot of chatter about how many plugins you should use and I mentioned that I use P3 (Plugin Performance Profiler). The reason I use it, is that it helps me to compare the efficiency of plugins of similar functionality. I can make a better choice if I know all of the pros and cons of each plugin. Not all developers understand performance tuning. That typically takes some time and skill to develop. I currently use 33 plugins on my site. I don't see P3 being a plugin that I keep active on my site, rather download it when I need it.
After 2 months of running NoSpamNX it had not caught a single thing, and after posting this information to the support site I receive no input from the author other than to mark my question as resolved. I noticed there was more support from members than the plugin author. So no results, no answers or help, it is gone. I deleted it from my plugin list since it wasn't doing anything.
Next up for my follow-up series was looking at the firewall plugin that I was using. In this case it was WordPress Firewall 2. It had not been updated for a long time and my site has more recently been getting hit harder and harder with spam traffic. There were times my site was being blocked by the plugin thinking it was a SQL Injection Attack. In reality it was me at Best Buy viewing my site from one of their laptops. Another case it was sending emails every half hour for over 2 days from the same IP address. There was no sign that it would ever stop. I needed to get a new firewall plugin!
I decided to remove the "WordPress Firewall 2" plugin and replace it with OSE Firewall™, it is a single plugin but it also comes with OSE Anti-Spam™ (uses Stop Forum Spam IP address pool) and OSE Virus Scanner™.
The anti-spam feature is great and provides me with the extra coverage I was looking for after removing NoSpamNX. No need to look for a replace for it! The OSE Anti-Spam™plugin will allow you to set how aggressive you want it to be identifying spam. For those things it lets go by, I depend on Akismet and AVH First Defense Against Spam to catch. So far no spam has made itself seen on my site. It is either stopped or displayed in the spam area of my comments for review. My only comment is that OSE Anti-Spam™ doesn't provide any feedback on what it is doing unless you have emails sent to your inbox, so that is what I am doing. I get a lot of emails of type "Stop Forum Spam IP"! Right now I feel the combination of the three anti-spam plugins I have running are doing a fantastic job of controlling spam.
The OSE Virus Scanner™ feature of the plugin provides scanning for viruses. It also displays a security badge on the bottom right corner of your site providing information to your visitors that you care about the safety of your site and theirs.
My updated list:
For security and spamming I use several plugins and most likely this is something that I will look at from time to time and perhaps try a few new plugins. I currently use;
- Akismet
- AVH First Defense Against Spam
- OSE Firewall™ (includes OSE Anti-Spam™ and OSE Virus Scanner™)
- AntiVirus
- BulletProof Security
- Login LockDown (Updated 5/7/13: BulletProof Security added "Login Security" as a feature so I no longer use Login LockDown)
- Fast Secure Contact Form
- WangGuard
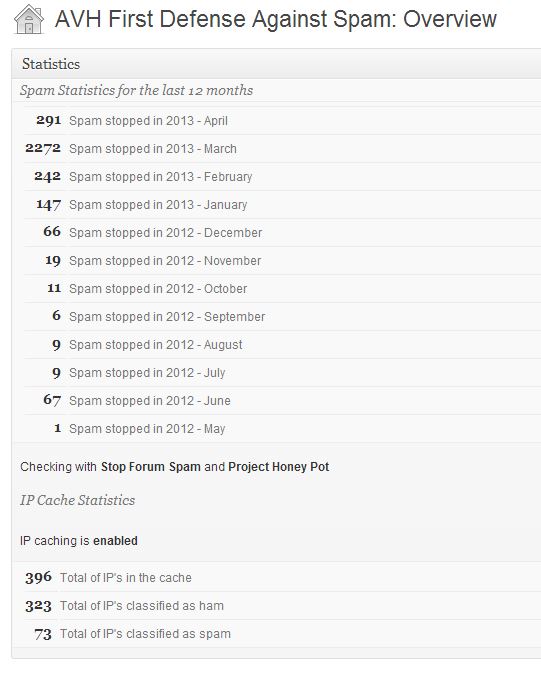
For those of you who like to see screen shots, attached are a few that I snapped for this article. You can see that March was a big spam month on my site. However, now that I have started to use OSE Firewall™ the AVH counts will be smaller, but only because the new firewall anti-spam is catching some of those spams now.
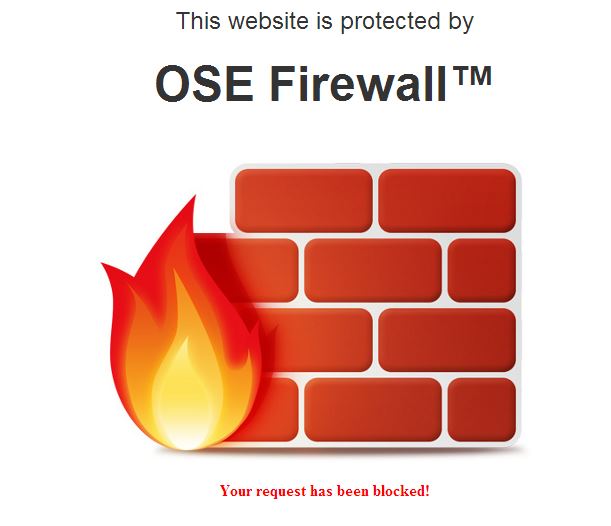
The new firewall can block against many types of attacks. If it detects an attack, a block page is displayed to the attacker. You also can test your sites firewall via a built in check in the plugin. This can give you peace of mind that your site is being protected.
I have not spent a lot of time discussing AVH but it is a great plugin and part of the trio of plugins I use for spam. It provides links in email communications that allow me to blacklist an IP with just a click. It will also notify me when some attempts to access directly the wp-comment-post.php.



A distributed denial-of-service attack? What's up with that?
I have not talked about the other plugins I use that personalize my site, those are very subjective. However, I will mention that I recently changed my view on social buttons. I originally liked displaying the buttons (Twitter, Facebook, G+, Pinterest) with counters, but more recently I decided that I don't want to add any overhead to my site that getting the counts brings with it. I recently switched to Simple Share Buttons and am very satisfied with the look and performance of the plugin. Check them out.
I hope the information above helps you in your ongoing work of keeping your Wordpress site up-to-date and if you think some of the plugins I mention could be of value to you give them a try. All are easy to use and provide good results.
Now back to my photo editing! Working on scanned negatives from December 1983. Enjoy life!
Epson Perfection V700 Photo Scanner

I spent about 2 years debating what type of scanner I wanted to buy before purchasing the Epson Perfection V700 Photo Scanner. I even sent 50 slides to ScanCafe to see what the quality was from them. If you are interested, you can read my post about them. A service can be a great time saver if you have a large film and/or slide collection. I had a Microtek scanner that I bought in 2002 that desperately needed to be replace. Some recent scanning of color pictures finally drove me to decided to get the V700. I had the negatives, why was I scanning the picture! I did a lot of reading of scanner reviews before my purchase. Important to me was the Digital ICE technology and I like the SilverFast software that comes bundled with the scanner. I didn't want to spend half my life in Photoshop healing hair and dust off of my film, so a scanner and software that supported infrared was high on my list of must haves. I don't use it for every picture, but it is amazing how much dirt there actually is on the film. Be careful how aggressive you get with the infrared or you can impact the final picture quality. For handling film I have cotton work gloves that I use to keep the oil from my skin off of the film. In addition or as an alternative, using a compressed gas duster on the film and scanner bed helps control the dust problem. A very good investment when scanning. I use it to dust the outside of the scanner as well.

There were many other things I would love to have on the scanner, like auto focus or better film holders, but I also wanted to keep my price in the $500 range if possible. I ended up spending $636 on the V700 at Micro Center. Overall I would rate the quality of the scanner a close 5 out of 5. There is very little to complain about and even the film holders provide the ability to adjust the height to improve focus. I scanned 12 slides using the different height adjustments and found that the factory setup was the sharpest scan (arrow pointing to +). The light source isn't LED so there is a short warm-up time, but I am looking for output quality as a priority.

Here is what's in the box.
- Epson Perfection V700 Photo scanner - with DIGITAL ICE technology
- 8" x 10" transparency unit (built into lid)
- Four film holders: 35mm negatives, 35mm slides, medium format and 4" x 5"
- Film Holder Height Adjusters
- 8" x 10" Film Area Guide
- CD-ROM with Epson Scan software and productivity applications
- DVD-ROM with Adobe® Photoshop® Elements 9
- CD-ROM with LaserSoft Imaging™ SilverFast® SE6
- USB 2.0 cable
- Epson Setup Sheet
- AC adapter and power cable

The scanner isn't worth much without the software and there is little purpose to have the scanner and not run the best software you can afford. The software it ships with is good and it may be all that you need. The first thing I did was to download the latest demo version of SilverFast 8 and made sure that it worked on my system and that I was comfortable with it. I spent about three days using the software and took advantage of their upgrade offer from version 6 to version 8 Ai Studio.
Using SilverFast 8 I currently scan to jpeg at 3,200 dpi. I have done some scans to tiff, but I will reserve that for photographs that I feel are of a special nature. Otherwise jpegs are fine for the scans. The software function in SilverFast I make the most use of is the Histogram. The scans on a flatbed scanner will never be perfect, but for my work as a serious photographer the investment was worth it.

Above is a scanned 35mm close-up picture I took of an electric meter in 1977 using a GAF 35mm camera.


The above picture was taken in Mohican State Park forest in August 1977. The flash fired, resulting in highlighting the foreground rocks and tripod. I scanned 39 slides from the camping trip to the park. I had forgotten about visiting the park until I scanned the slides.

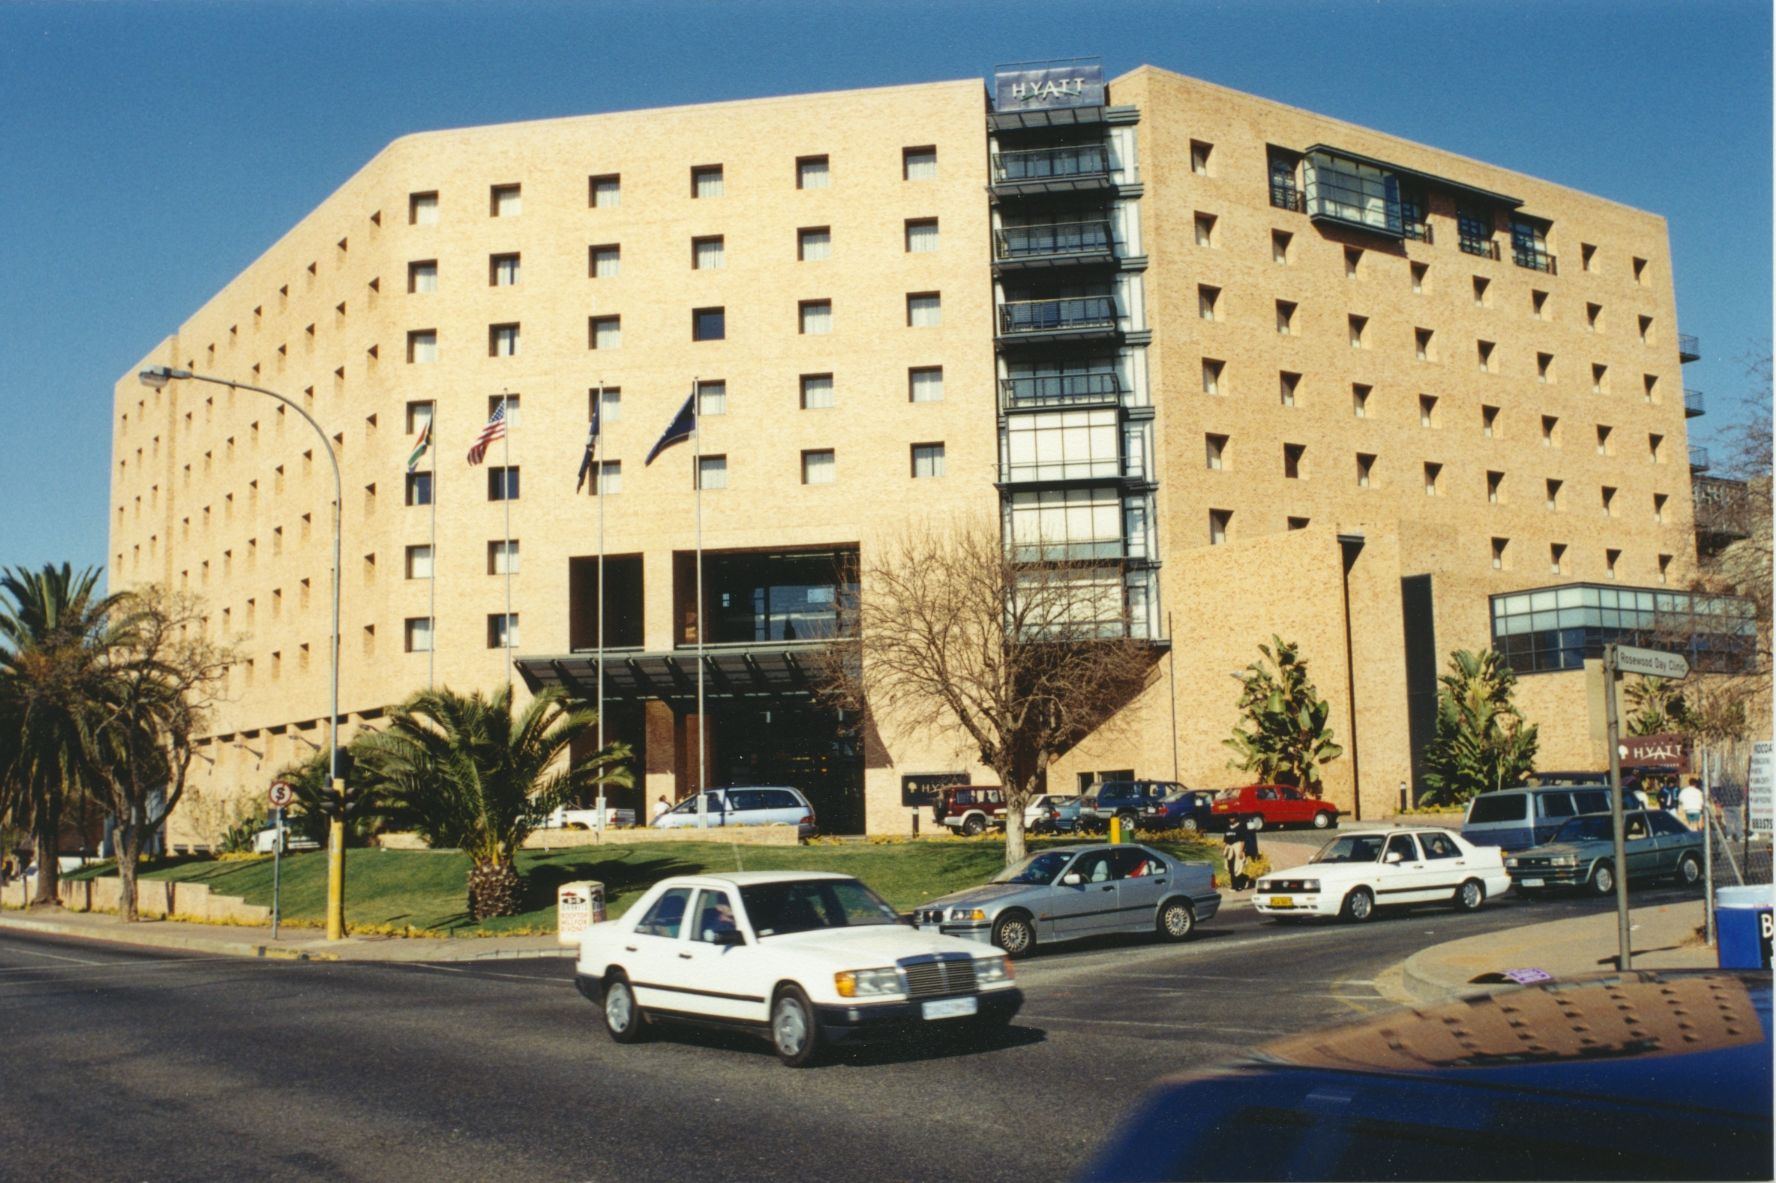
The above picture had histogram adjustments only. No sharpening was applied to the image when it was scanned.
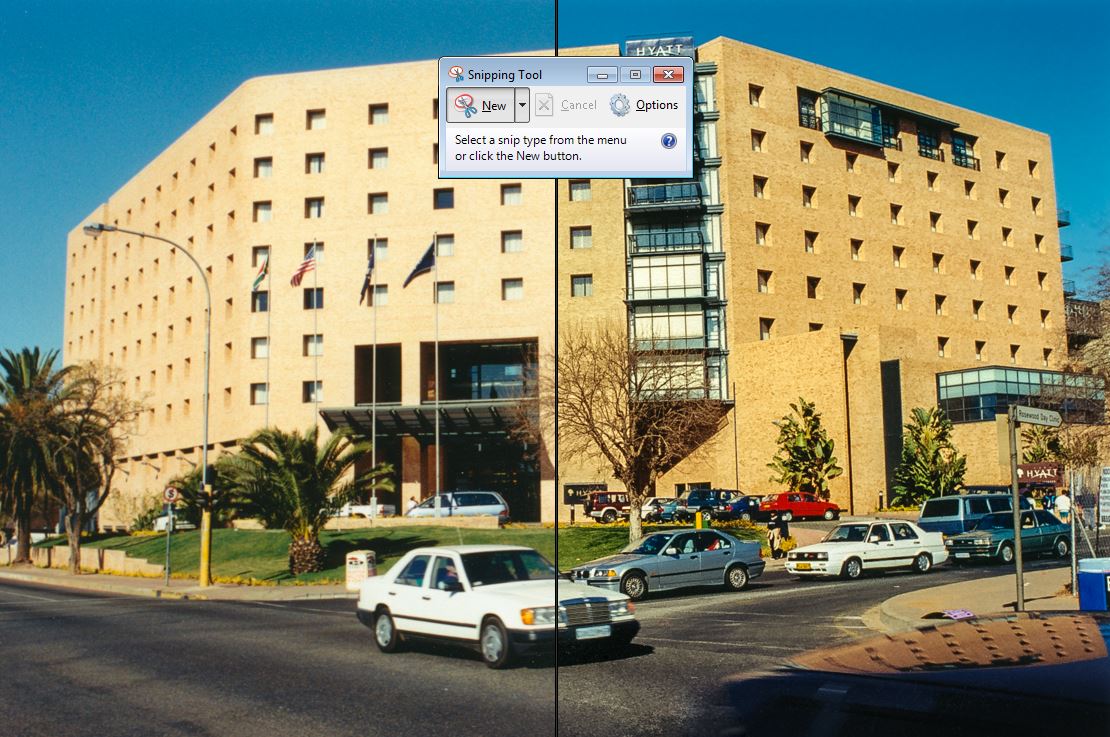
The same picture compared side-by-side to the raw scan and the adjusted finished product.

See the follow-up to this post about scanning negatives, click here.
Unlock your memories and find those old photos!

Thanks for visiting our blog. We hope you will find our site informative or inspiring. Whichever, get out and take some pictures.
Harold & Geet
Pictures on Flickr