Scanning Negatives on the Epson V700

I have been using my Epson V700 to scan slides for the past couple of months. I wrote a review of the scanner about 2 months ago. If you want to read the original article click here. I scanned a few pictures for that post on the V700 scanner, but not any negatives. Scanning negatives was one of the primary reasons I bought the V700 Photo Scanner so I figured I best get at it! Many people have stated that the negative holders feel cheap or flimsy, and I guess they do compared to the slide holder. So when loading in negatives make sure that you take your time and work on a flat surface. That should help prevent any damage from occurring.
The first negatives I scanned were the first ones I found in my storage compartment. I reached in and took out some of the envelopes and stopped at the first one that also contained the negatives. That turned out to be from a work Christmas party in December 1983. So they were just over 29 years old. The prints were stored with them and I did remember correctly that the color of the prints was muted and not very vibrant. I like my pictures to pop a little more so I was going to have to fix that. The negatives were in good condition, meaning never handled, stored in a dry place and flat, not curled.
The film was taken to a local drug store for processing on Dec 26, 1983 and was Kodak Kodacolor VR 100 (the label on the film is KODAK CP 100). The film was cut into strips of 4 and the Epson negative holders can hold a strip of 6. So that wasn't going to be a problem. When handling the film I used cotton gloves, and after mounting the negatives into the holder (KODAK CP 100 facing down towards the flatbed) I sprayed them with a compressed gas duster as the only cleaning I did. I then turned the scanner on and started SilverFast 8. From the research that I did and the few days that I used the demo software, I decided that SilverFast was the way to go for me. I really do not care about ease of use because what I need is something that works, not something that is easy. Believe me, SilverFast is much easier to learn than Photoshop. I was able to become comfortable with SilverFast in about 3 days working a couple hours each day. Since then, each day builds on the previous and now I am learning additional info about Silverfast at my leisure.
I scanned the first batch of negatives manually, and the second batch using the automatic features of SilverFast. In this case I found the automatic processing to do a very good job. I was happy with it, but of course nothing escapes Lightroom and Photoshop for the final result. I do not add sharpening during the scanning process. I save that for the processing I do in LR and PS. This post is really about the V700 and not any software that I use with it, so I will say that SilverFast has the CP 100 negative type film that I can select to tell it what type of film is being scanned.

What I found is that the final image from the scanned negatives look good, were well received when I shared them with my friends, and some were surprised that I had scanned them from negatives and not the actual print itself. As typical, the scanned negatives were a little soft on focus, but could be adjusted to a sharper image if necessary. Just be careful not to add too much, it is best to keep people on the softer side of a focus anyway! Many times I adjust a pictures lightness and darkness based on a person's hair. Trying to make sure it has some detail and the shading looks good. Skin tones needing to be correct is a no brainer so don't miss the boat there.
They say a picture is worth a thousand words, so here are some pictures that illustrate what I have discussed above.

Notice how the details of the blouse are brought out perfectly and the skin tones are pleasant as well. Just a little rosy color on the cheeks.
The next set of pictures shows the before and after scanned negative of Mr. Hunter as well as the scanned version of the actual picture from 1983. When scanning a picture you need to replace the white insert into the lid of the scanner (reflective scanning).


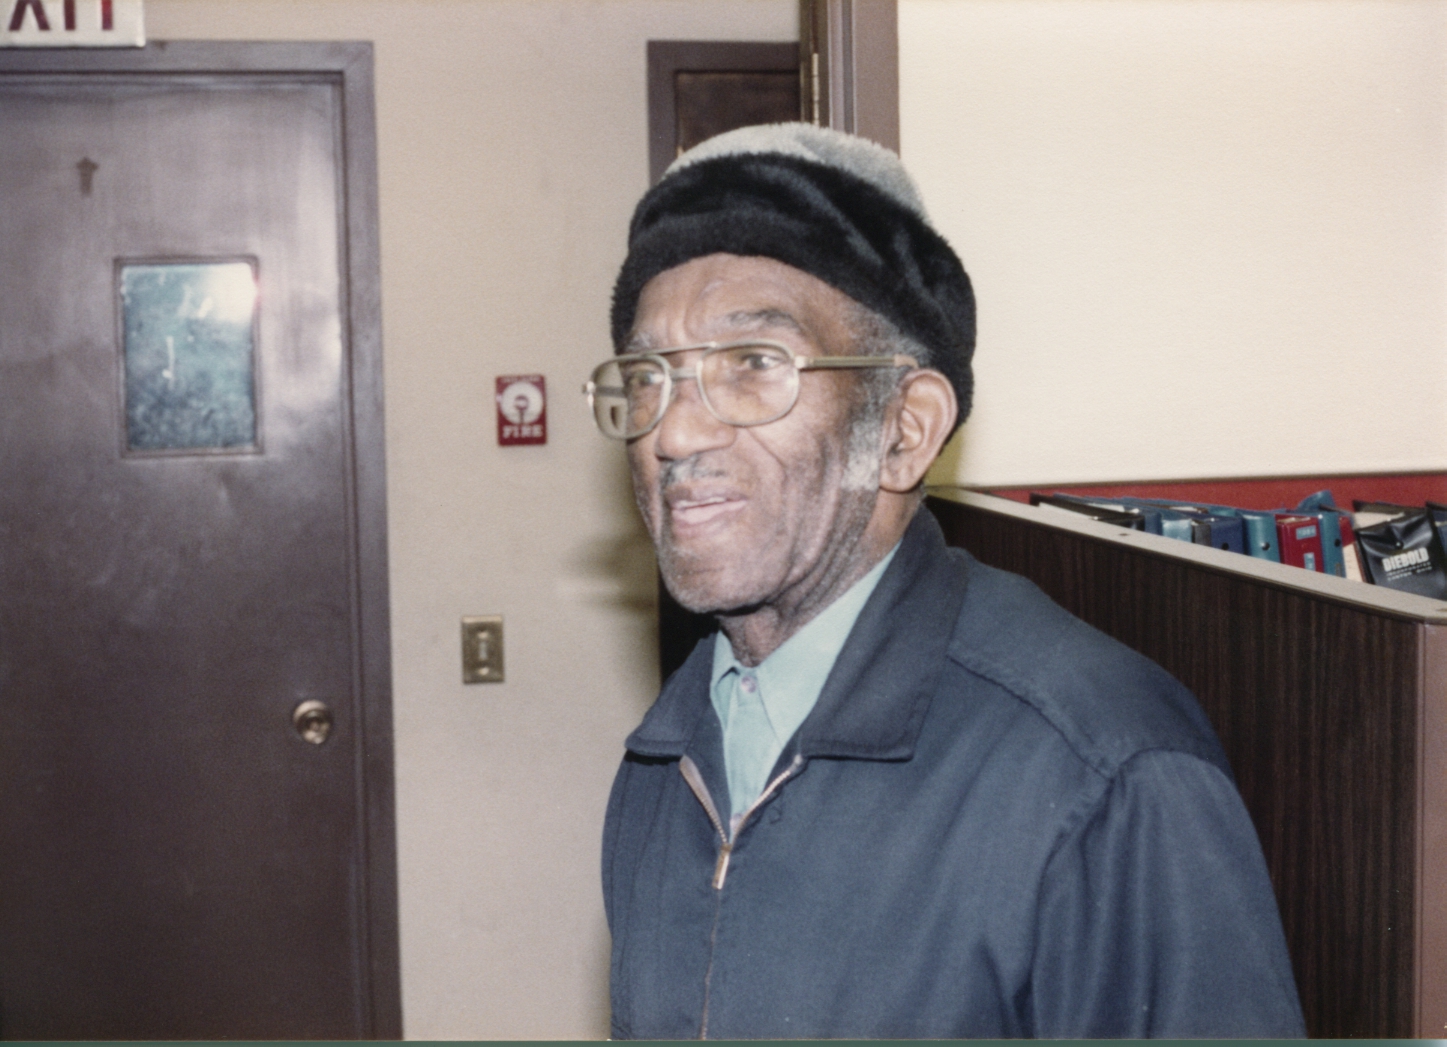
Naturally the above scanned photo could have color correction applied and the colors from the negative versions would be similar. The negatives were scanned at 3,200DPI and larger versions of the picture look very good.
Note: The scanned negative contained more information that what was actually printed in the picture in 1983. In this case the negative scan brought in more information which made a difference on many of the other prints from this set.
Hopefully the above information has been useful or has inspired you to scan in some of your old photographs and share them digitally with your friends.
Ashtabula, Ohio - Flying Saucer Gas Station
I have this converted Super 8 film on my YouTube and Vimeo site as well as a page on this blog. I am adding it as a post since it is so popular. I happen to have had my Super 8 camera with me the day I drove by the flying saucer gas station. I don't know how many people took a film or video of the gas station, but most people have said this is the only video they have seen and the lights are working as well. I feel pretty fortunate to have captured a piece of highway history all those years ago. Who knew? The guy hanging out of the car is magician Ed Ellis. He was a musician at the time (drummer), but he is more widely know for his magic skills. He has performed throughout the US, Europe, Korea and a frequent performer at the world famous Magic Castle. Who knew that would happen as well!
Also you might note that I said I shot the film on a Super 8 camera. It was not sound film. So where did the sound come from? I added it from my library of over 40,00 sound effects. By adding multiple layers the sound appears to have been captured at the scene all those years ago. As I mentioned in other areas of my blog site, I always add a little something extra to all my films. In this case it was sound.
Today more people take pictures and video than ever before. That's great, but what happens after that? Are you saving or archiving it? Will people see it 30 years from now? Record history, keep a journal, you can tell the real stories of the past someday. A past that you lived that is real, not a past that has been doctored or distorted!
Keep on recording history through the lens of your cameras!
[mapsmarker marker="5"]
ScanCafe: Give it a try!
I have done a lot of picture scanning over the years and for the most part I am happy with what I have done. I do make a few adjustments while scanning, trying to get a better scan, but that doesn't make me an expert. Most of the pictures I have scanned were from the 1930's through the 1960's. They were are all in family albums, and most were black and white. Scanning them required taking the albums apart. However, when it comes to my 35mm pictures I have the negatives and slides available, which make for better results. Fantastic, except for the fact that this can take a lot of time and money to get a decent result. After scanning you will probably still want to process them through your favorite editing application, but that is optional of course. I prefer Lightroom and Photoshop. Then key wording, captions and posting to my website are the final steps. So the time invested adds up very quickly. Working with the RAW, jpg or tiff pictures for publication to my site is where I want to invest my time. If I could find someone that did a decent job scanning my pictures and then I worked with them after that point, that would be perfect for me.
Based on the above a friend and I decided to send some slides to ScanCafe and see what they could do. I am not going to spend a lot of time talking about shipping costs or wait time. That is posted on their site and has been commented on by a few people. I read all of the ScanCafe site very carefully and read a couple of reviews. I was not surprised or shocked by anything that occurred, and I didn't go bouncing off the walls with wild speculation waiting on the delivery of my photos and DVD. The slides and a few prints were processed and returned in less than 2 months. In total we sent just under 600 slides and prints. It was their $130 plus S&H box that they provided to ship everything in. We bundled the slides into groups of 50 and numbered them. When they were returned they were still in the bundles of 50 that we had sent, and all fit onto a single DVD. Each numbered bundle was on the DVD under a directory with the same bundle number. That made it very easy to identify each bundle and what it contained. I did not see anything that was damaged and the scans were well done. The 4x6 paper prints looked about what I typically can achieve and unless I had a lot of prints with no negatives, I wouldn't have any prints scanned. A few slides had some scratches and dust that had not been removed, but most were in good enough shape that not much repair work was required in my editing apps.
Some people will probably be concerned about their photos, negatives and/or slides being sent to India, but regardless of where your photos are sent, there is always a chance of them being lost or destroyed. Even if they never leave your house there is a chance of them being lost forever. A real world example dates back to the 70's when my friend worked for a well known department store. A courier would drive to each store and pickup the film that had been dropped off for processing. One day the courier accidentally left a bag of film in a restaurant and it was mistaken for a bag of trash and was thrown into a dumpster. It was never recovered. My friend was instructed to tell the customers that their film and the courier had been killed in a fiery car crash to keep their customers from pursuing the matter further. It actually worked. So there are no guarantees with anything you do.
Seeing is believing and so here are some examples of slide conversions done for me by ScanCafe. The photographs of the bridge were taken on the July 4th weekend in 1977. The trio is a lounge band called "Something Different" and was photographed around the same time period. They were filmed in the basement of my friends house and the yellow cast is how the slides looked back then. All were stored in plastic cases that were provided by the processing lab.


Most of the digital versions of my slides were color balanced properly, had low noise and minor spots and marks on them. Next time I will try out there pro services to see how they compare to the standard service. ScanCafe offers a great value when it comes to digital transfer of slide film. Next up will be some negatives as well. Give them a try and be patient. It takes a few weeks to get your photos back.
8mm Conversion Thoughts

I was surfing the net today looking at the "how to" videos for film conversion (16mm, 8mm and Super 8) and was amazed at what I saw. Obviously you can convert your films however you what, but personally I would never put one of my films into an old projector and watch it. Too many dangers with that. People can say whatever they want, but I have seen film sprocket holes just shredded by projectors because the film was just breaking apart. Next comes the big burn hole in a couple of frames from the old "hot" bulbs. That still brings on flashbacks for me. Projectors converted for film transfer use "cool" light sources that also distribute the light evenly over the film rather than the typical hot spot you see when projecting film from a standard projector. Treat your film as fragile and valuable. Please do not capture your video off of a projected image on a wall or sheet of paper. That's like filming your wedding on your cell phone.
Typically the biggest problem projecting your old films is splices coming apart, and it isn't unusual to see scotch tape used instead of splicing tape. Film can be pretty dirty as well. Cleaning it helps for a better transfer so you don't see all that "stuff" clinging to the film. The Buddy Rich film on this site had a scotch tape splice on it that I didn't touch. I had to edit around it rather than try and fix it. It is also why you have to inspect the film before you project it. Over the years your film can have mold embedded into it that cannot be removed. There are a few ways that you can work around this after the film is digitized, follow this link to read more. The prep work done before converting helps for a better end product. For an overview of transfer methods see my Film Conversions page.
I really enjoy taking one of my old Super 8 films and bring it back from the coma it has been in since the 70's. Ask your parents and other family members what film they may have stuck in the corner of their house and get started bring them back from the brink.
Super 8 Film Before
This Super 8mm film was shot under poor lighting conditions at an awards banquet in 1978. It isn't unusual to see film in this condition after 30 years of storage. Typically films made in the 50's and 60's are actually in better condition than films made in the 70's. However, it is hard to predict what the true condition of the film is until you transfer it. During digital capture the camera was adjusted to minimize the red shift, but as you can see it didn't help. This was a Super 8 sound film, probably Ektachrome (introduced in 1971). In the film you can hear the camera motor running. Something you would never notice because typically you hear the projector which is much louder.
This is after applying fixes in post. There is still some work that can be done on the audio. How good the fixed video will look is very dependent on the quality of the original. Low light and the high amount of grain makes the task very difficult. There is a lot more editing that could be done to this film to improve its flow and make it more watchable.
This is a video of my friend Roger Henry who passed away just before his 35th birthday. This is the very first post I made on my Blog and I dedicate it to him.

Thanks for visiting our blog. We hope you will find our site informative or inspiring. Whichever, get out and take some pictures.
Harold & Geet
Pictures on Flickr